Table of Contents
We learned in previous chapters how to connect LCD with Arduino. In this, you will learn how to interface keypad with arduino using keypad library and to display numbers and/or characters on the LCD screen.
REQUIRED HARDWARE
Following Hardware will be required to perform this circuit.
| S.No. | Item | Quantity |
| 1 | Arduino Uno | 1 |
| 2 | Breadboard | 1 |
| 3 | Alphanumeric LCD 16×2 | 1 |
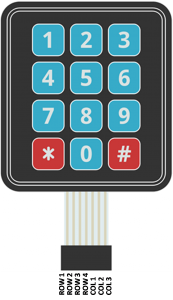
| 4 | Keypad 4×3 | 1 |
| 5 | Resistor 10K ohm | 1 |
| 6 | Male to Male jumper wire approx | 25 |
BUILDING CIRCUIT
Make the following connections with Arduino
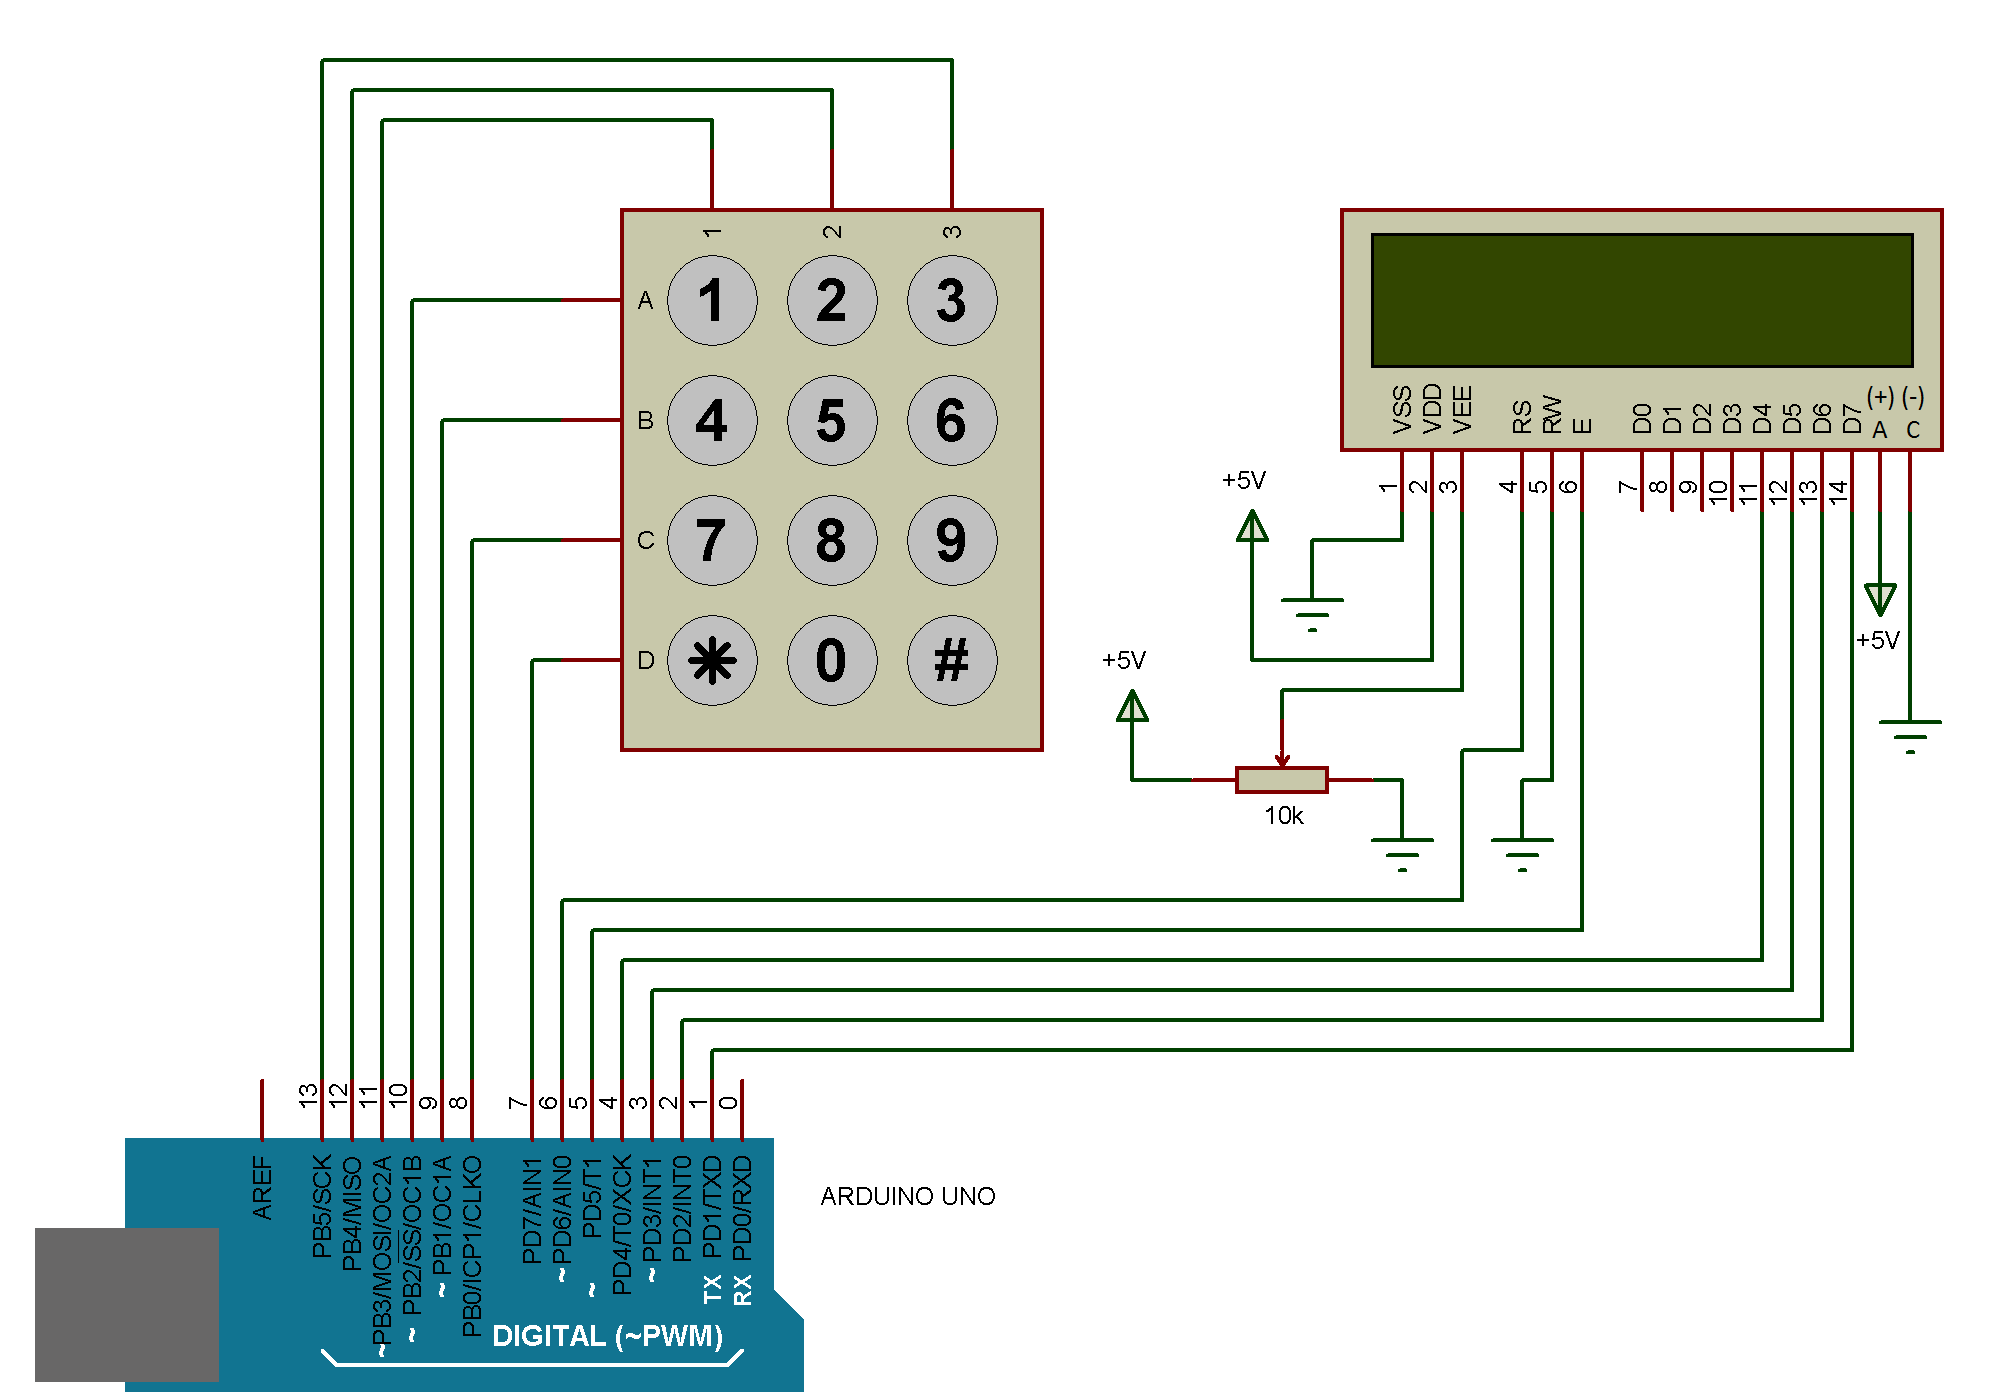
REAL TIME KEYPAD 4X3 PINOUT
ARDUINO CODE KEYPAD WITH ARDUINO USING KEYPAD LIBRARY
ALSO READ: CODE USING WITHOUT KEYPAD LIBRARY
// Include LCD and Keypad Library
#include<LiquidCrystal.h>
#include <Keypad.h>

// Define LCD (RS,E,D4,D5,D6,D7) pins
LiquidCrystal lcd(6, 5, 4, 3, 2, 1);

// Define two variables ‘ROWS and COLS’ of ‘const byte’ type and assign 4 & 3 to them
const byte ROWS = 4;    // four rows
const byte COLS = 3;    // three columns

/* Define 2-Dimension character type array ‘keys’ of 4 rows and 3 columns and assign values to them (1- #)
*/
char keys[ROWS][COLS] = {
  {'1', '2', '3'},
  {'4', '5', '6'},
  {'7', '8', '9'},
  {'*', '0', '#'}
};

// Define two 1-Dimensional byte type array “rowPins colPins” and assign values to them
byte rowPins[ROWS] = {8, 9, 10, 2}; // r1, r2, r3, r4 connect to the row pinouts of the keypad
byte colPins[COLS] = {13, 12, 11}; // c1, c2, c3 connect to the column pinouts of the keypad

// Define integer type variable ‘count’ and one character type array ‘typed’ of 5 values
int count = 0;
char typed[5];                //to get five numbers in that array

//Keypad::Keypad(char*, byte*, byte*, byte, byte)
//Keypad(char *userKeymap, byte *row, byte *col, byte numRows, byte numCols);
Keypad k = Keypad( makeKeymap(keys), rowPins, colPins, ROWS, COLS );

void setup() {
  Serial.begin(9600);
  lcd.begin(16, 2);
  lcd.setCursor(0, 0);
}

void loop() {
  /*The function getKey() returns a key value as you press the key but it does not repeat automatically.
     Also, when we release the key we can track the key RELEASED event if we are use the eventListener feature of the library.
  */
  char key = k.getKey();

  if (key) {
    typed[count] = key;      //storing data in character array
    Serial.println(key);
    lcd.print(key);
    count++;                  //counting number of characters So that can be used to do other things
  }
}
OUTPUT
After uploading the program into Arduino, you will find as you press keys on the keypad the number will get displayed on the LCD screen, If you like you can use Serial monitor using serial communication for the output screen.
ALSO READ
KEYPAD CONTROLLED LOCK USING ARDUINO WITH KEYPAD LIBRARY