To install ESP8266 on Arduino IDE, you need to follow these instructions
- Open the preferences window from the Arduino IDE.
Go to: File > Preferences - Copy this URL “http://arduino.esp8266.com/stable/package_esp8266com_index.json” and paste into the “Additional Board Manager URLs” field as shown in the figure below. Then, click the “OK” button.

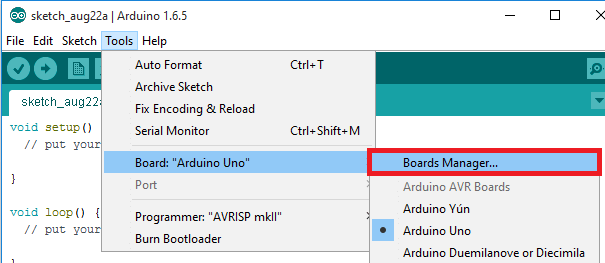
Click to zoom - Open boards manager.
Go to: Tools > Board > Boards Manager
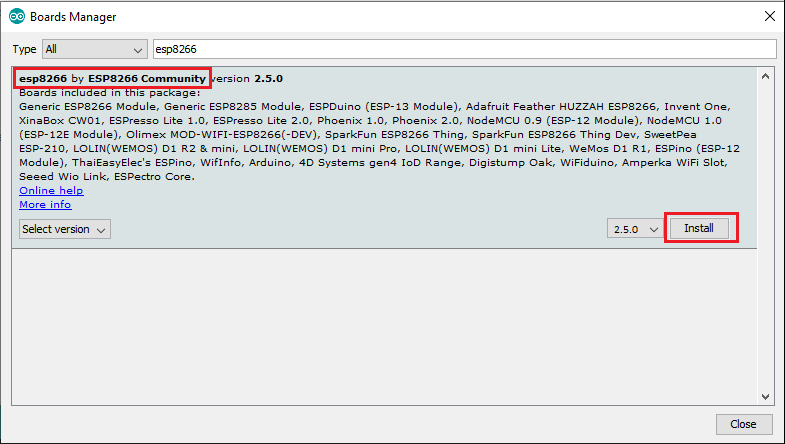
Click to zoom - Scroll down or search in search bar “ESP8266” and Install “esp8266 by ESP8266 Community”. Then wait for few minutes to get it installed.
Note: You need Internet connection while file gets download

Click to zoom - After download you can see different boards are now available in Go to: Tools > Board

Click to zoom - Select the board you are using, for NodeMCU you can select
- NodeMCU 0.9 (ESP-12 MODULE) or
- NodeMCU 1.0 (ESP-12E MODULE)


fine and simple steps for beginner and professionals